EP5: Cara betulkan error “permission denied” ketika install Synology Active Backup for Business agent.
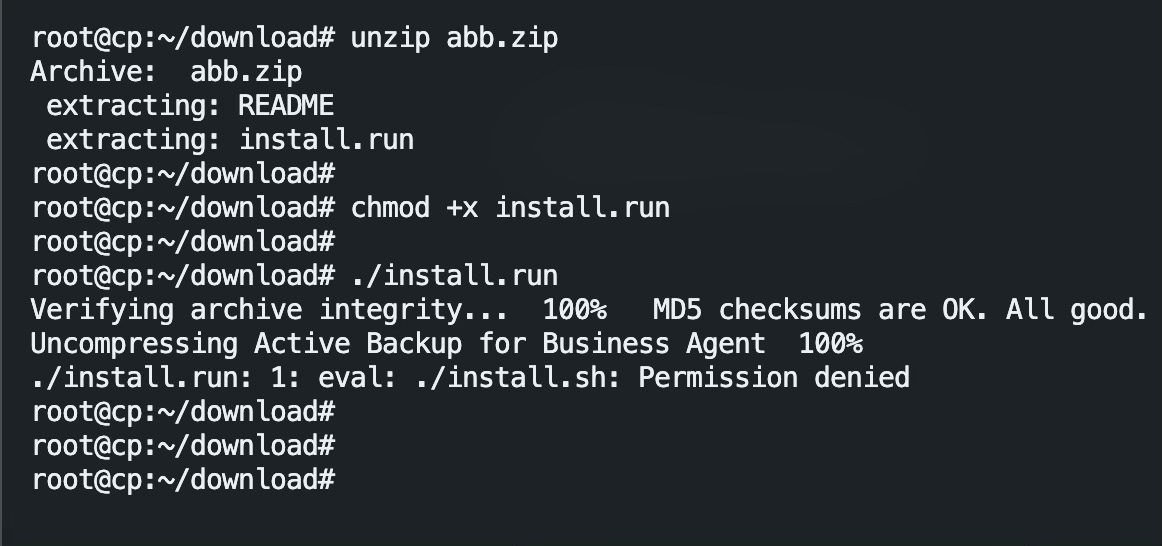
Anda akan menghadapi error “permission denied” sekiranya anda memasang agent Synology Active Backup for Business untuk virtual machine yang dicipta di atas Proxmox meskipun anda telah memberikan permission untuk execution. Sebagai contoh :
sudo ./install.run
Verifying archive integrity...  100%   MD5 checksums are OK. All good.
Uncompressing Active Backup for Business Agent  100%
./install.run: 1: eval: ./install.sh: Permission denied
Hal ini disebabkan installer tersebut secara default mengekstrak dirinya ke dalam folder /tmp. Namun begitu folder /tmp tersebut telah ditetapkan dengan setting “noexec” diamana sebarang fail binary tidak akan dibenarkan untuk dijalankan dalam folder tersebut. Ini sebagai salah satu strategi keselamatan sistem Linux.
Untuk mengesahkan folder /tmp teleh di set kepada “noexec”, anda boleh menjalankan arahan berikut dan perhatikan sekiranya “noexec” wujud pada output.
mount | grep '/tmp'Output :
/usr/.tempdisk on /tmp type ext4 (rw,nosuid,nodev,noexec,relatime)
/usr/.tempdisk on /var/tmp type ext4 (rw,nosuid,nodev,noexec,relatime)
Jika dilihat pada output tersebut, ia jelas menunjukkan setting “noexec” telah ditetapkan. Maka installer tersebut tidak akan dapat dijalankan.
Jadi untuk menyelesaikan masalah ini, anda perlu cipta satu folder tmp baru pada direktori yang tidak mempunyai tetapan “noexec” dan maklumakan pada installer tersebut path folder tmp yang baharu.
Langkah 1 : Pastikan execution permission diberikan pada file install.run
chmod +x install.runLangkah 2 : Cipta satu folder .tmp yang baru. Sebagai contoh saya cipta folder .tmp dalam root folder
mkdir /root/.tmpLangkah 3 : Jalankan arahan pemasangan agent Synology Active Backup for Business dengan menyertakan path untuk TMPDIR yang baru dicipta tadi.
TMPDIR=/root/.tmp/ ./install.runPemasangan berjaya !
Verifying archive integrity...  100%   MD5 checksums are OK. All good.
Uncompressing Active Backup for Business Agent  100%
Hit:1 https://mirrors.gbnetwork.com/ubuntu jammy InRelease
Get:2 https://mirrors.gbnetwork.com/ubuntu jammy-updates InRelease [119 kB]
Hit:3 https://mirrors.gbnetwork.com/ubuntu jammy-backports InRelease
Get:4 https://mirrors.gbnetwork.com/ubuntu jammy-security InRelease [110 kB]
Ign:5 http://rpms.litespeedtech.com/debian jammy InRelease
Hit:6 http://rpms.litespeedtech.com/debian jammy Release
Hit:7 https://repo.zabbix.com/zabbix/6.4/ubuntu jammy InRelease
Fetched 229 kB in 1s (267 kB/s)
Reading package lists... Done
Building dependency tree... Done
Reading state information... Done
32 packages can be upgraded. Run 'apt list --upgradable' to see them.
 * start checking dependency of (4)
 * checking linux-headers-5.15.0-91-generic
 * linux-headers-5.15.0-91-generic has already installed
 * checking dkms
 * dkms has already installed
 * checking make
 * make has already installed
 * checking libaio1
 * libaio1 has already installed
 * start installing snapshot driver and agent service
 * installed snapshot driver is the same version, no need to install
 * installed agent service is older, install new one
 * installing Synology Active Backup for Business Agent-2.6.2-3081.deb
(Reading database ... 156878 files and directories currently installed.)
Preparing to unpack Synology Active Backup for Business Agent-2.6.2-3081.deb ...
Unpacking synology-active-backup-business-linux-service (2.6.2-3081) over (2.6.0-3032) ...
Setting up synology-active-backup-business-linux-service (2.6.2-3081) ...
 * The installation is complete. You might enter "abb-cli -c" to connect to Synology NAS and back up the Linux device. To learn more commands about Active Backup for Business Linux agent, please type "abb-cli -h".
Anda boleh gunakan langkah yang sama ketika anda update agent Synology Active Backup for Business.


